Implementing Browser Router and Navigation Bars in your web applications
What is Browser Router? Who is Browser Router? Why is Browser Router? I will only answer one of these questions in this post (as the other two are dumb, and I’ll let you figure out which one is the right one).

Simply, Browser Router is React’s router implementation for HTML5 browsers. They direct traffic functions on the internet and essentially make frontend pathways to different pages within an app or website, without redirecting (refreshing) the page. It’s a great way to resolve the page “flicker” that immediately dates a website to the George W. Bush era. It’s what makes a SPA work in such a smooth fashion. SPA stands for Single Page Application, unfortunately for those of us who could really use a 60-minute massage right now. In a SPA, views render seamlessly on the same page, without the website being reloaded.
WHAT IS A NAVBAR?
Oh hey, you’ve seen this before! Though it’s so common, you may not have noticed it:

“Navigation Bar,” or colloquially “NavBar,” is a term that describes a graphical user interface tool that helps a user navigate your app based on accessing information specific to their needs. A “NavBar” tab that reads “Contact” should lead to a page with the email, address, phone number, birth chart, etc. of a the app’s company or designer. NavBars are an assumed part of modern UI — you and I use them often without even noticing the sleek behind-the-scenes code that is involved with this type of routing. Routers and Navigation Bars are nearly synonymous. The first describes the inner-workings of the latter.
ROUTING
Routing with Browser Router allows you to handle rerouting in a way that is declarative, meaning you can simply name each route using the <Route></Route> tags in the main App component of your React app.


Using “path=/contact” here will, well, link whatever path you have declared. Your <Link> tag within the NavBar component will redirect to a specific page using to=“/contact” to facilitate the routing, which we’ll talk about more in the implementation section of this post. Essentially, you’re telling the router to follow a specific line of logic that you’ve designated elsewhere in your components and render whatever you have programmed to be displayed on that particular page.
IMPLEMENTATION
First, install Node on your PC. Then use the following npm commands to create a new React app and access the file with your text editor.

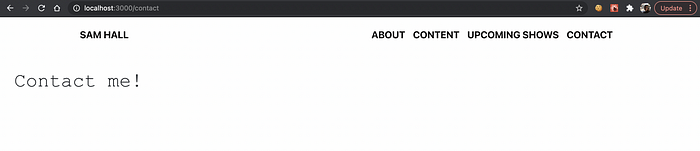
You can usually view what you’re currently displaying in your app by navigating to the local browser via http://localhost:3000/.
You’ll then need to import BrowserRouter and wrap your <App> component in a <Router> component. Your index.js file should look something like this:
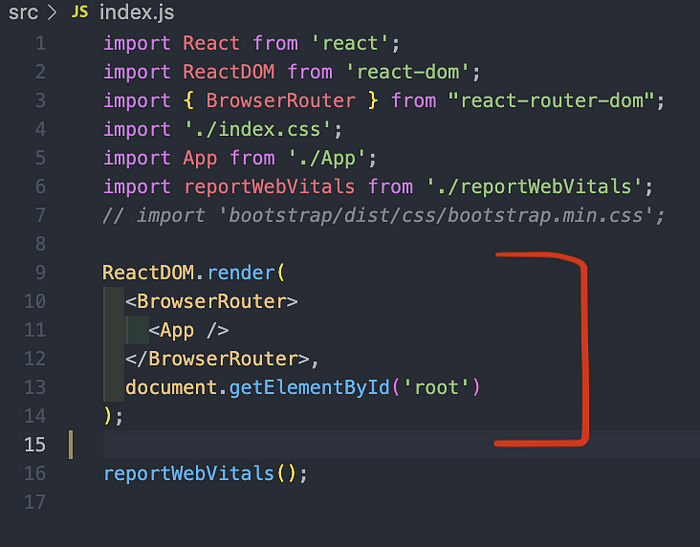
By doing this, BrowserRouter essentially stores a history of your app locations, keeps previous pages in mind, and navigates to other pages accessible by the user.
Wrap the entirety of your navigable components in a <Switch> tag. This tag looks for <Route> paths that match <Link> pathways. Remember to keep your <NavBar> and any external components outside of the <Switch> tag! Use <Route> tags in your App component to match other components, and their content, to a location:

Match pathways in a NavBar component by using the <Link> tag.
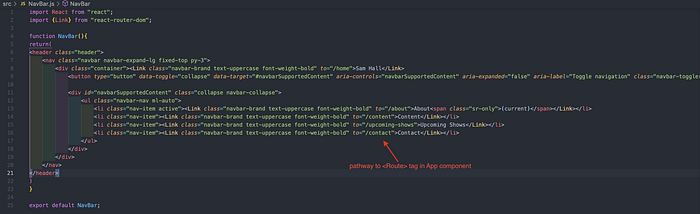
By creating this link, here listed as a <li> element in the NavBar component, the “Contact” tab is clickable by a user and will be redirect seamlessly to a new URL, and therefore a new page within the app. This tab should display all content associated with the separate “Contact” component without the need for a page refresh.